\(\newcommand{L}[1]{\| #1 \|}\newcommand{VL}[1]{\L{ \vec{#1} }}\newcommand{R}[1]{\operatorname{Re}\,(#1)}\newcommand{I}[1]{\operatorname{Im}\, (#1)}\)
Installation on Mac
Terminal.app
We’ll be typing at the “terminal” prompt often during the class. In OSX, the
program giving the terminal prompt is Terminal.app. It comes installed
with OSX.
Press the Command key and the spacebar at the same time to open the Spotlight search box. Type “terminal” and press return to open Terminal.app. You should get a terminal window. Consider pinning Terminal.app to your dock by right-clicking on the Terminal icon in the dock, chose “Options” and “Keep in dock”.
Homebrew
Homebrew is “The missing package manager for OSX”. It is a system for installing many open-source software libraries packages on OSX. I recommend Homebrew to any serious Mac user; you will need it for the instructions on this page.
To install Homebrew, follow the instructions on the homebrew home page.
The Atom text editor
Download the Atom installer for Mac from the https://atom.io. Go to your
Downloads folder and click on the Downloaded atom-mac.zip file. This will
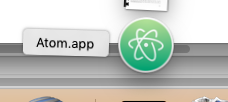
unzip the files into your Download folder. You should now see an Atom icon
for the Atom.app application folder in your Downloads, maybe something
like this:
Open a new Finder window, navigate to the Applications folder, and drag the
Atom.app folder to the Applications folder.
Double-click on the Atom folder icon in the Applications folder to open Atom for the first time. At the dialog “Atom.app is an application downloaded from the Internet. Are you sure you want to open it?”, select Open. Atom should now be installed.
See also installing atom.
You will also need the hydrogen plugin for Atom. Install from Terminal.app with:
# Install dependencies with homebrew
brew install pkg-config zeromq
# Install the plugin
PYTHON=python2.7 apm install hydrogen
Git
On Mavericks (OSX 10.9) and above, git comes with the Apple OSX command
line tools.
To get these, type git at the terminal command line. If git is not
installed already you will get a dialog box like this:
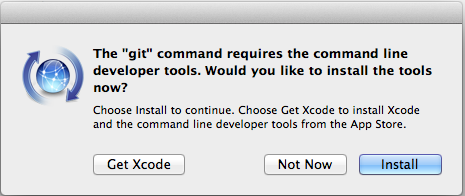
Click ‘install’ to install the OSX developer command line tools, including git.
If you have an earlier version of OSX, please install the most recent version of git from this git OSX installer page.
Python and packages
A standard way
This is the way that I (MB) installed on my Mac laptop, so it will be easiest for us to support you if you do the same thing.
Install Python 3 with Homebrew
In Terminal.app, type:
brew install python3
Confirm that you have Python 3 and the Python 3 package installer pip3
commands correctly placed into one of the directories that your system
searches for programs, with these commands and their expected outputs:
$ which python3
/usr/local/bin/python3
$ which pip3
/usr/local/bin/pip3
Set up user installs
The standard correct way to use pip (and, in our case) pip3 is to
install packages into your user’s environment, rather than into the main
system that is shared across users. This is called a pip “user” install.
If you have Python 3.5, a user install on OSX will put the package files into
a set of directories starting with ~/Library/Python/3.5, where ~
refers to your home directory.
Packages may have command line programs. These will be installed to
~/Library/Python/3.5/bin. You need to put this directory on your
PATH. To do this, start Terminal.app and type:
atom ~/.bash_profile
This will open the Atom editor and load the file .bash_profile from your
home directory. .bash_profile is a text file that contains commands that
will run every time you open a new Terminal.app Window or tab. At the end of
this file, add these lines:
export PATH="$HOME/Library/Python/3.5/bin:$PATH"
Save and close Atom. Quit and reopen Terminal.app in order to reload the
.bash_profile configuration. Check the PATH is correct with:
echo $PATH
The value you see should start with the path to the Library/Python/3.5/bin
sub-directory in your home directory.
Install the packages you need as user
Type this at the terminal prompt:
pip3 install --user numpy scipy matplotlib ipython nibabel jupyter
Check that these have installed, and that your PATH is correctly set, with:
$ ipython
at your terminal (bash) prompt. You should see something like this:
$ ipython
Python 3.5.2 (default, Jul 28 2016, 21:27:57)
Type "copyright", "credits" or "license" for more information.

IPython 5.1.0 -- An enhanced Interactive Python.
?         -> Introduction and overview of IPython's features.
%quickref -> Quick reference.
help      -> Python's own help system.
object?   -> Details about 'object', use 'object??' for extra details.

In [1]:
Type quit and press return to exit the IPython program.
Other ways
There are various other ways to install Python 3 and the Python packages. If you already have a version of Python 3 that you are using, you are welcome to use that instead of Homebrew Python. For example, you might prefer to use the big installer package called Anaconda from Continuum Analytics to install your Python and other packages.
Finally
However you installed Python 3 and the packages, don’t forget to do the Installation check.